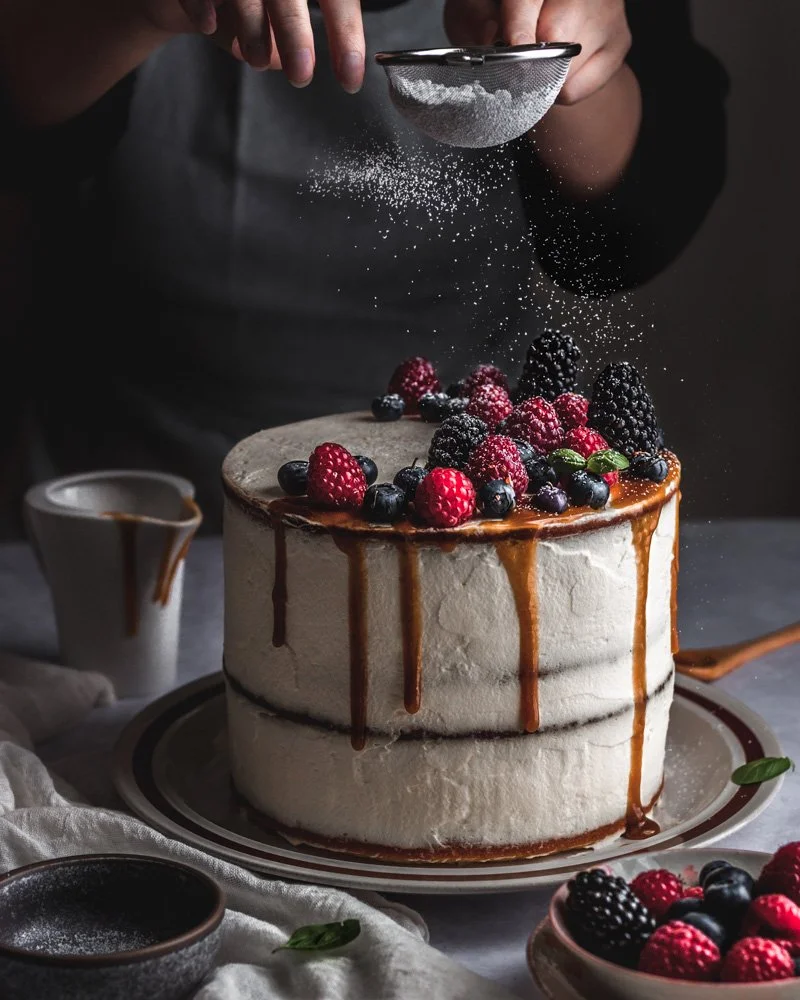
Berries and cream pancake cake


A different take on a pancake stack.
A vanilla-y and buttery cake cooked in a pan on the stove.
Based on a pancake recipe, made to be more cakey and retain its texture even after being in the fridge.
You can't have pancakes without maple syrup, so this features a maple syrup soak and a maple caramel. I've always felt that pancakes with berries and cream is extra fancy, so I of course had to use them here.
...also because the mother bought cream with absolutely no plan to use it again..........
It works perfectly as a single layer cake, and I can tell you that the single layer trials were happily gobbled up.
I'll be the first to admit that it sounds kind of gimmicky. That's because it is. Kind of? It was based on this idea that I had of a layered cake using pancakes, but it turned into an actual cake but cooked in a pan on the stove.
It's totally not necessary to go all out and make multiple layers like me - it's pretty damn good as a single layer, plain, maybe with a bit of icing sugar dusted on top. If you just want to make a single layer cake, just quarter the recipe.

The cake is based on a pancake recipe that I used, given to the mother from her workmate (i.e., no idea where it came from originally). However, I wanted to make it more cake-like because I find that the texture of pancakes tends to degrade after being refrigerated. As such, I added more fat (in the form of butter) and more sugar. Feel free to replace the butter with oil, though keep in mind that it would not taste buttery as a result. Also feel free to reduce the sugar to 300g overall. I've tried it both ways.
The whipped egg whites doesn't make the cake fluffy as you'd think, because there aren't enough whites to do so for this amount of batter, but it does lighten the texture a bit.
You want to create the most stable meringue you can to give the batter the longest staying power since it'll be sitting in the bowl while you cook each layer, so pay careful attention to the instructions.
Starting on a low speed creates smaller and more stable air bubbles. This is such a simple trick, but I see so many recipes fail to mention it.
However, because the batter will have to sit in the bowl if you only have one pan, I would not suggest making more than 4 layers worth of batter at a time.
If you're feeling lucky, go for the four layers, otherwise I'd actually suggest going for 3 layers (If you're not sure how to do that, just multiply the recipe quantities by 0.75 OR divide them by four then multiply that by 3).
Also, if you'd like more cream to go between the layers, the sides and the top, you may want to increase the cream to as much as 1.2 litres (1200ml). I used 600ml and it was just enough for a thin layer (as thin as a crumb coat) on the top, sides and between the layers due to having to fill in the gaps on the sides because of the tapered pan shape.

The pan I used was 20cm at the widest end and roughly 14cm at the narrowest end. If you use a larger pan, the cooking time will differ - you'll want to cook it for a shorter time. I would not suggest going smaller as your cake is likely to brown too much or the inside will not be fully cooked (unless you use the batter to make thinner layers).
Avoid opening the lid too often when cooking the cake - you want to keep the temperature as even as possible, and opening the lid releases the hot air.

Recipe
For the cake
Makes 4 20cm cake layers
INGREDIENTS:
4 eggs, separated into yolks and whites
360g castor sugar, separated into 180g and 180g
240g unsalted butter, melted
2c milk, warmed
2tsp vanilla extract
500g plain flour
8tsp baking powder
1/4tsp cream of tartar
METHOD:
1. Get a large bowl and weigh it so that you can divide the batter evenly later.
2. To that bowl, add the yolks and 180g of the sugar. Whisk until lightened in colour and texture.
Combine the warm milk, melted butter, and vanilla. Whisk into the yolk mixture.
Sift in the flour and baking powder. Gently whisk until combined, then set aside.
3. Grease your non-stick pan and heat it with the lid on on the lowest flame.
4. Meanwhile, in a separate large bowl, start beating the whites and cream of tartar on a low speed (I used speed 2 on my hand mixer).
Beat until ALL of the whites have become a thick foam. Increase speed to medium-low (3-4 speed).
Beat until just under soft peaks. Add in a little of the sugar at a time. Once soft peaks are reached, increase speed to medium.
Once you've beaten in all the sugar, increase speed to medium-high (6-7) and beat until stiff peaks. You may get something more like a bird's beak, but that's ok.
5. Gently fold the whites into the yolk mixture until no streaks of either mixture remain.
6. If you don't mind not perfectly even layers, skip to step 7.
Weigh your bowl with batter again. Subtract the empty bowl weight (that you weighed earlier) to get the weight of the batter. Now divide that by 4 to get the amount of batter you should pour for each layer.
7. Pour 1/4 of the batter into the preheated pan. Lightly bang pan on the bench to get rid of large air bubbles and smooth out the top if necessary.
Cook on a low flame for 25 minutes until the top is no longer wet like batter, bounces back when pressed, and a cake tester or skewer comes out clean when inserted (you should check around the 20 minute mark).
Turn out onto a cooling rack.
8. Re-grease pan again if necessary and repeat step 7 three more times.
9. Leave cakes to cool completely on the cooling rack.
For the maple caramel
INGREDIENTS:
140g maple syrup
2tbsp cream
15g butter
METHOD:
1. Heat the maple syrup over medium-low heat until it starts to bubble. Let it bubble for a 2-3 minutes. Only stir occasionally to ensure it doesn't burn on the bottom or sides.
2. Add in the cream. Stir to combine, then add in the butter and stir until melted and combined.
3. Allow to continue to bubble until your desired consistency is reached. You can test this by dripping some on a plate and placing in the fridge to cool quickly.
For the maple syrup soak
INGREDIENTS:
80g maple syrup
20g water
METHOD:
1. Combine both ingredients. Stir to ensure they are fully combined.
For the whipped cream
Double the quantities if you want more than a thin layer of cream
INGREDIENTS:
600ml thickened cream, cold
4tbsp castor sugar OR to taste
1tsp vanilla extract (optional)
METHOD:
1. Pour all ingredients into a large bowl and start beating on a medium to medium-high speed with a handmixer or standmixer. Beat until you've reached a little over soft peaks but not quite stiff peaks. This is because when you spread the cream out onto the cake, you're essentially continuing to whip it, and we want to avoid overbeating.
To assemble
INGREDIENTS:
1 batch cake
1 batch maple syrup soak
1 batch whipped cream
375g fresh berries (I used blueberries, raspberries, and blackberries)
1 batch maple caramel
METHOD:
1. Level each layer of cake with a knife or cake leveller if necessary. If your cake is heavily tapered like mine, place one layer wider side down onto your cake plate. This creates a more stable base.
2. Using a pastry brush, soak the cake with some of the maple soak. You may want to poke holes over the top of the cake if that part was touching the pan. Spread a thin layer of the cream onto the cake (or more if you increased the cream quantities).
3. Place another cake layer on top. If tapered like mine, make sure the same sides are touching (see photos). Repeat step 2.
4. Layer with some of the berries, making sure to slice any larger ones in half before placing on top (e.g., I sliced the raspberries and blackberries, placing them cut side down, but not the blueberries). Dollop more cream on top to ensure a flat surface.
5. Repeat step 3 two more times.
6. Using the rest of the cream, cover the top and sides of the cake. If you are using more cream, feel free to do a crumb coat first.
7. Decorate with the rest of the berries and the caramel.
That's it!
Store in the refrigerator, covered.
Best served at room temperature